In the world of e-commerce and online businesses, building a strong and recognisable brand is essential. One effective way to reinforce your brand's identity and professionalism is through branded emails and tracking pages. Shipbubble offers a straightforward solution for creating these branded elements. In this article, we'll walk you through the process of setting up your branded email and tracking page.
Before you can start customising your branded email and tracking page, you'll need to have a Shipbubble account. If you don't have one already, sign up for an account here. Once you're logged in, you're ready to get started.
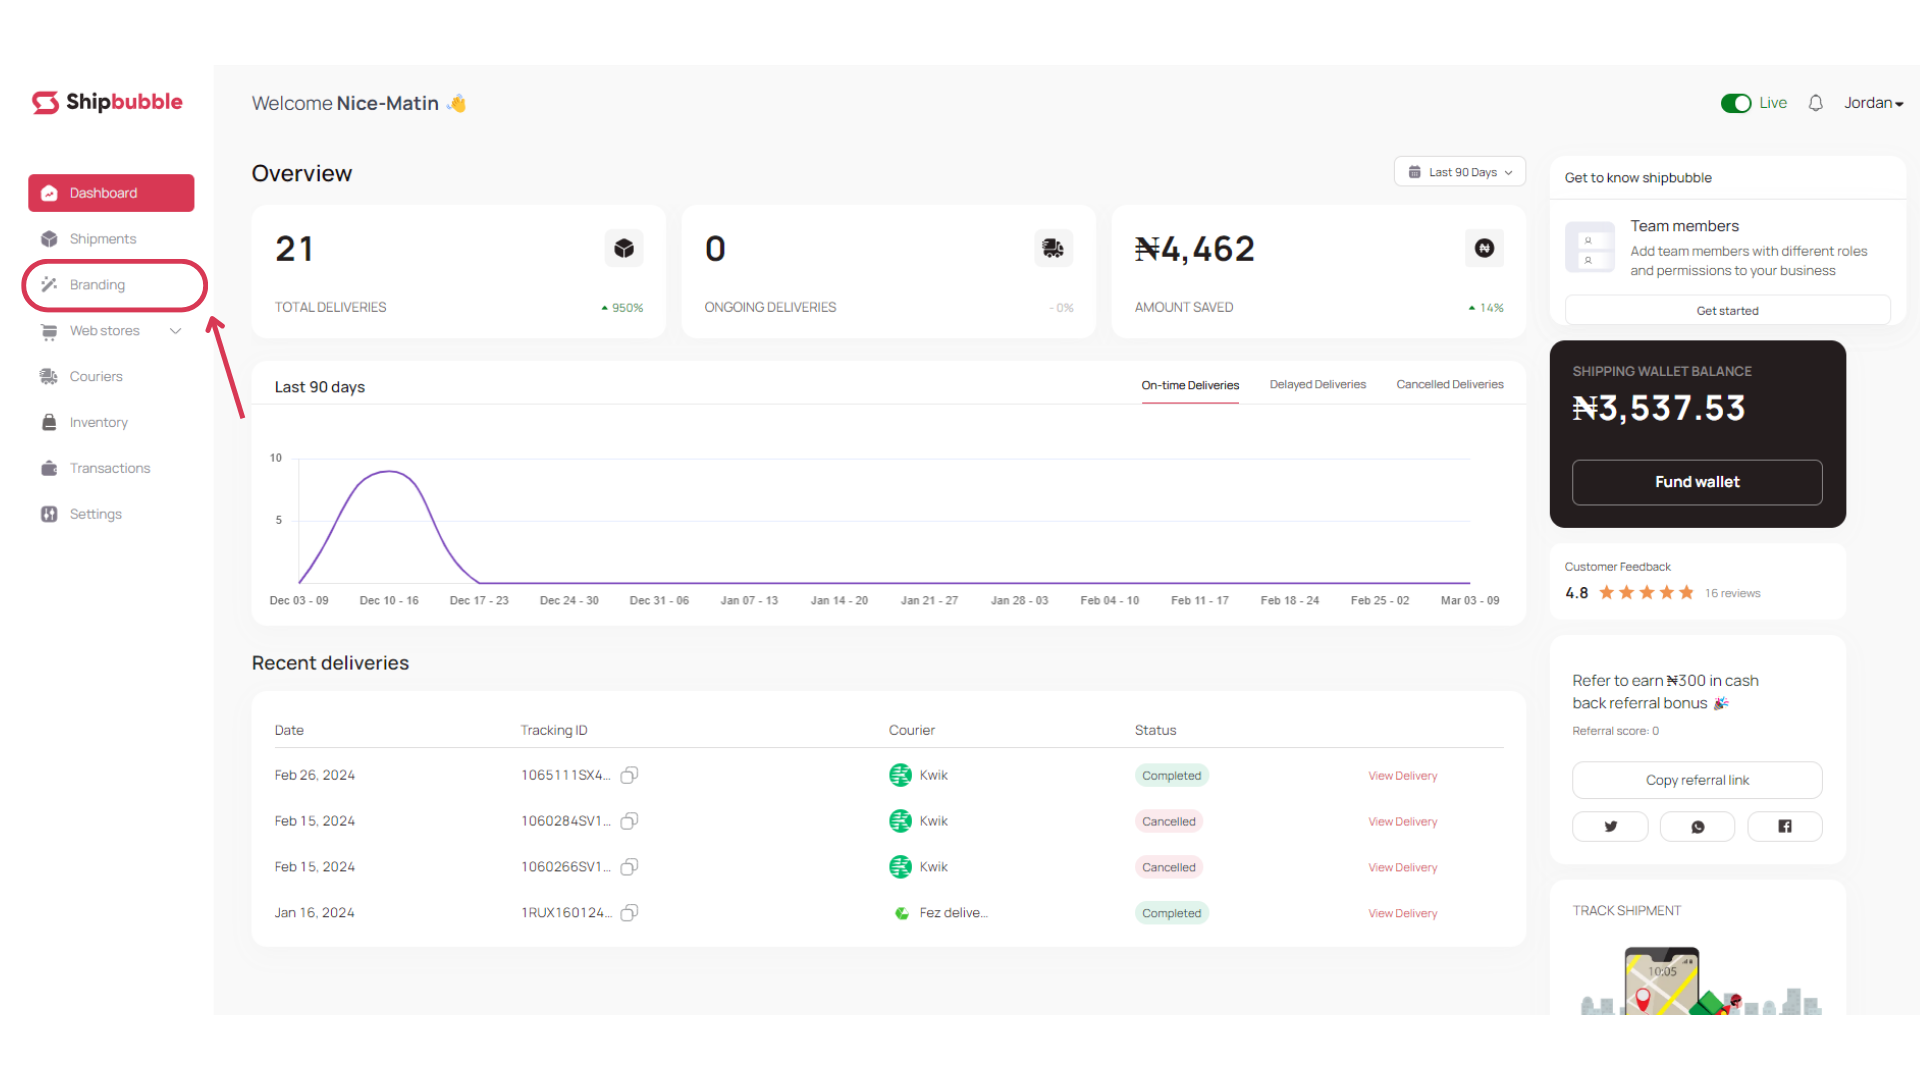
- Go to the menu on the left-hand side of the page and click on Branding and then Tracking Page.
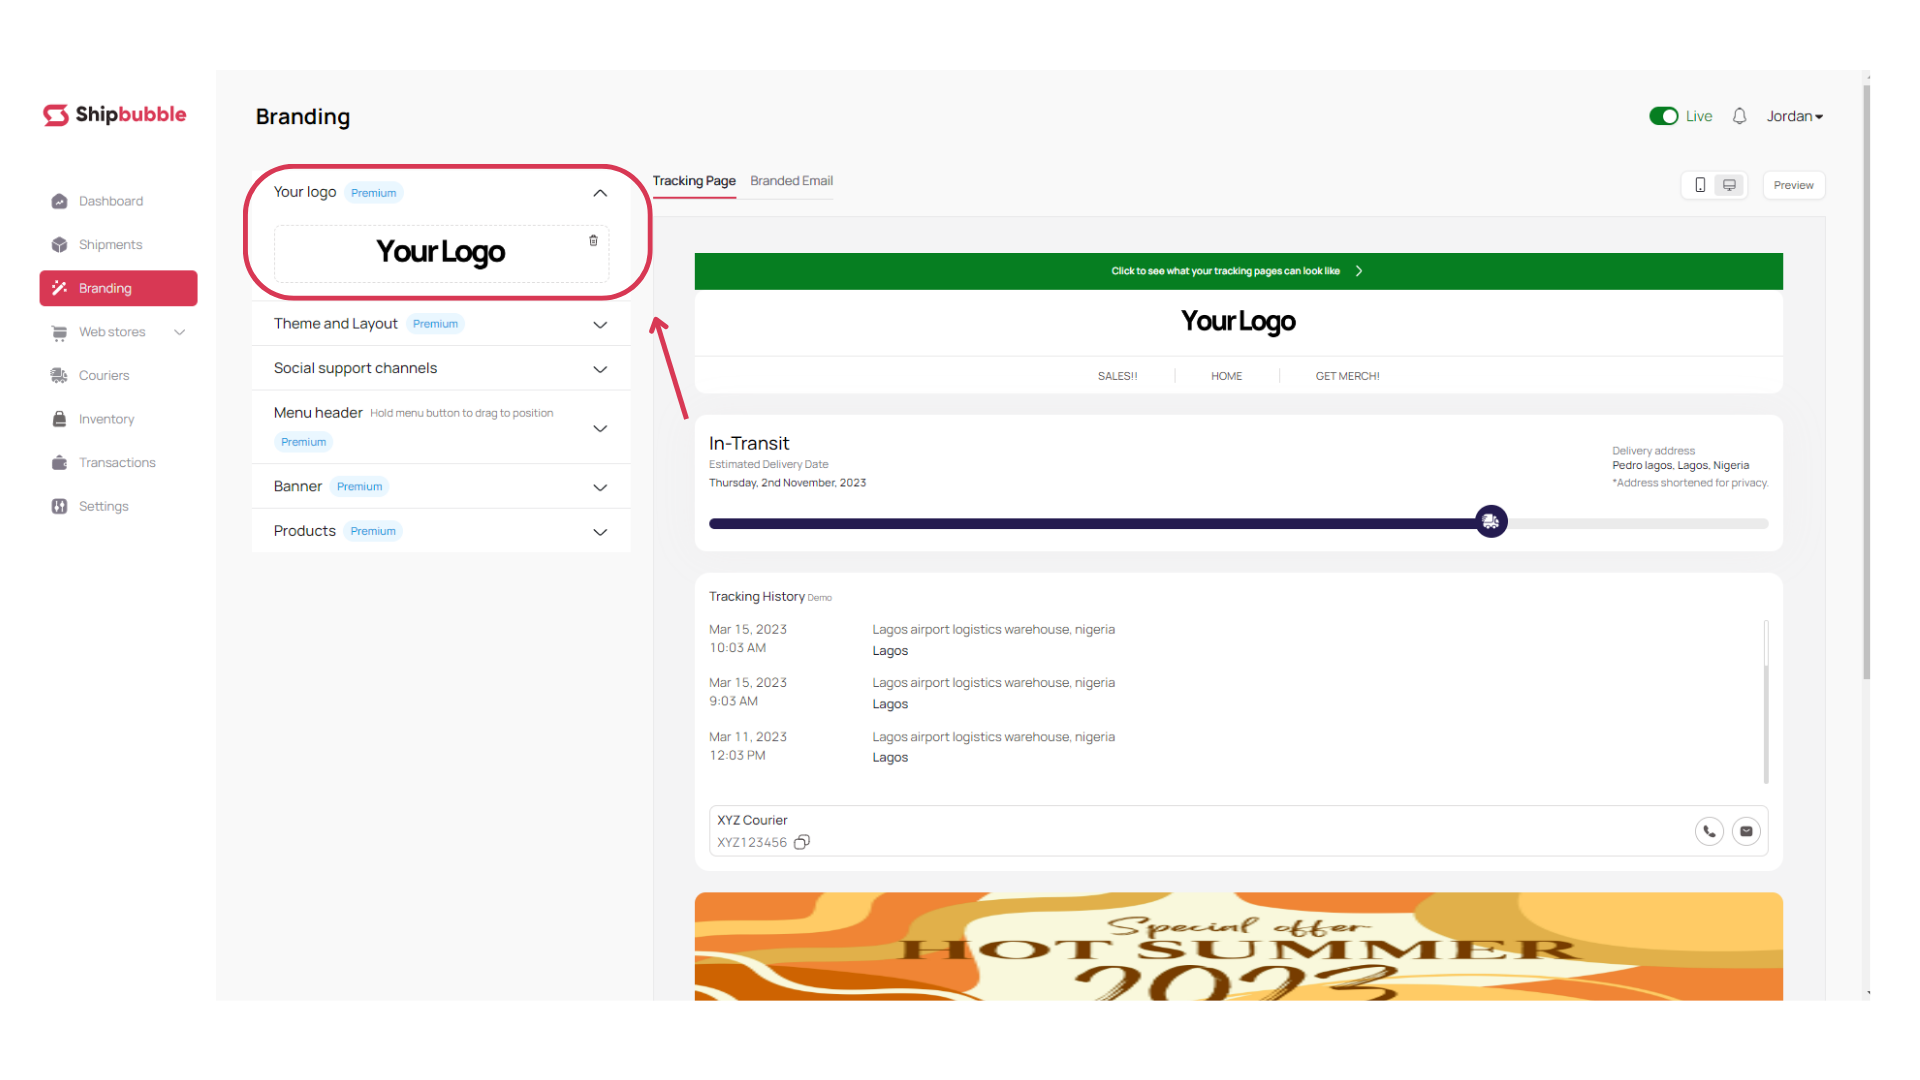
2. Once you’re on that page, start by uploading your brand's logo. This logo will be displayed in the email header, making your emails instantly recognisable to customers.
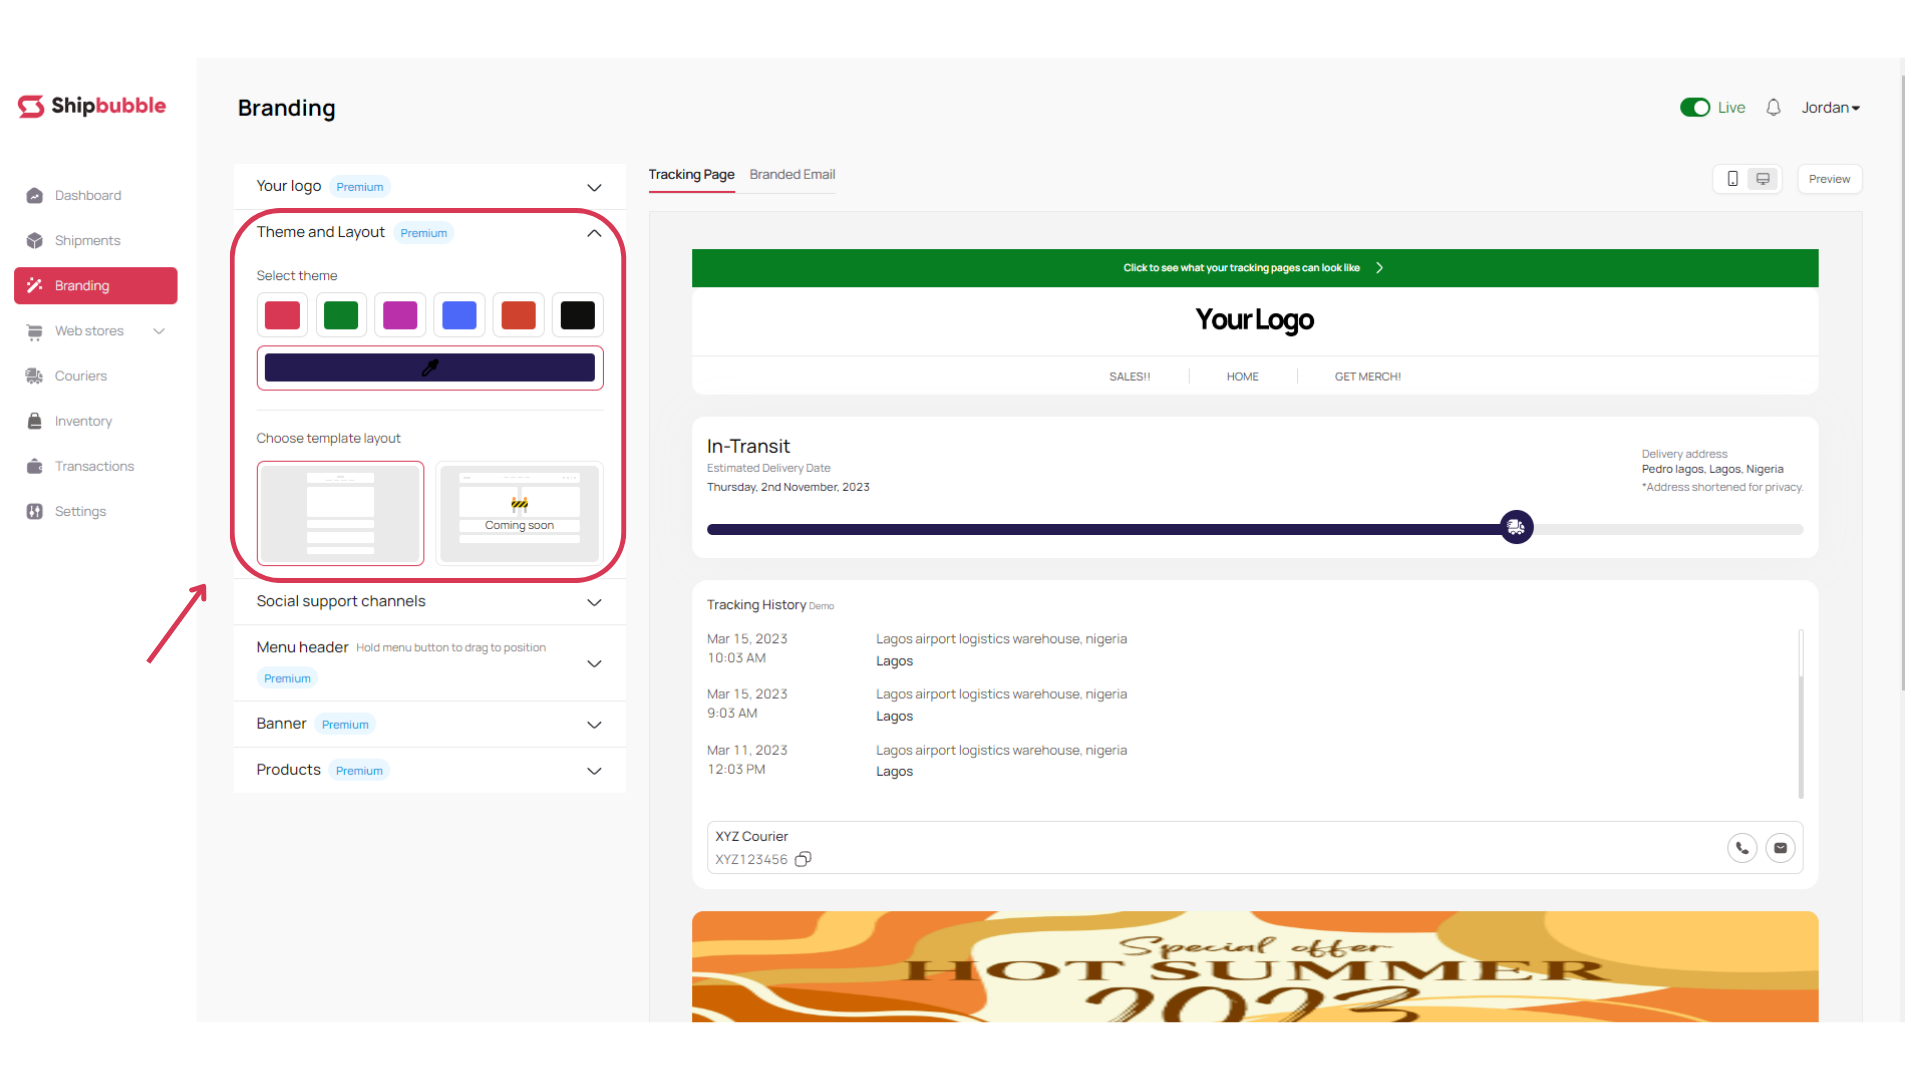
3. Customise the email theme and layout: Shipbubble allows you to choose the theme and layout for your emails. Ensure that they match your brand's colour scheme as much as possible for a cohesive look.
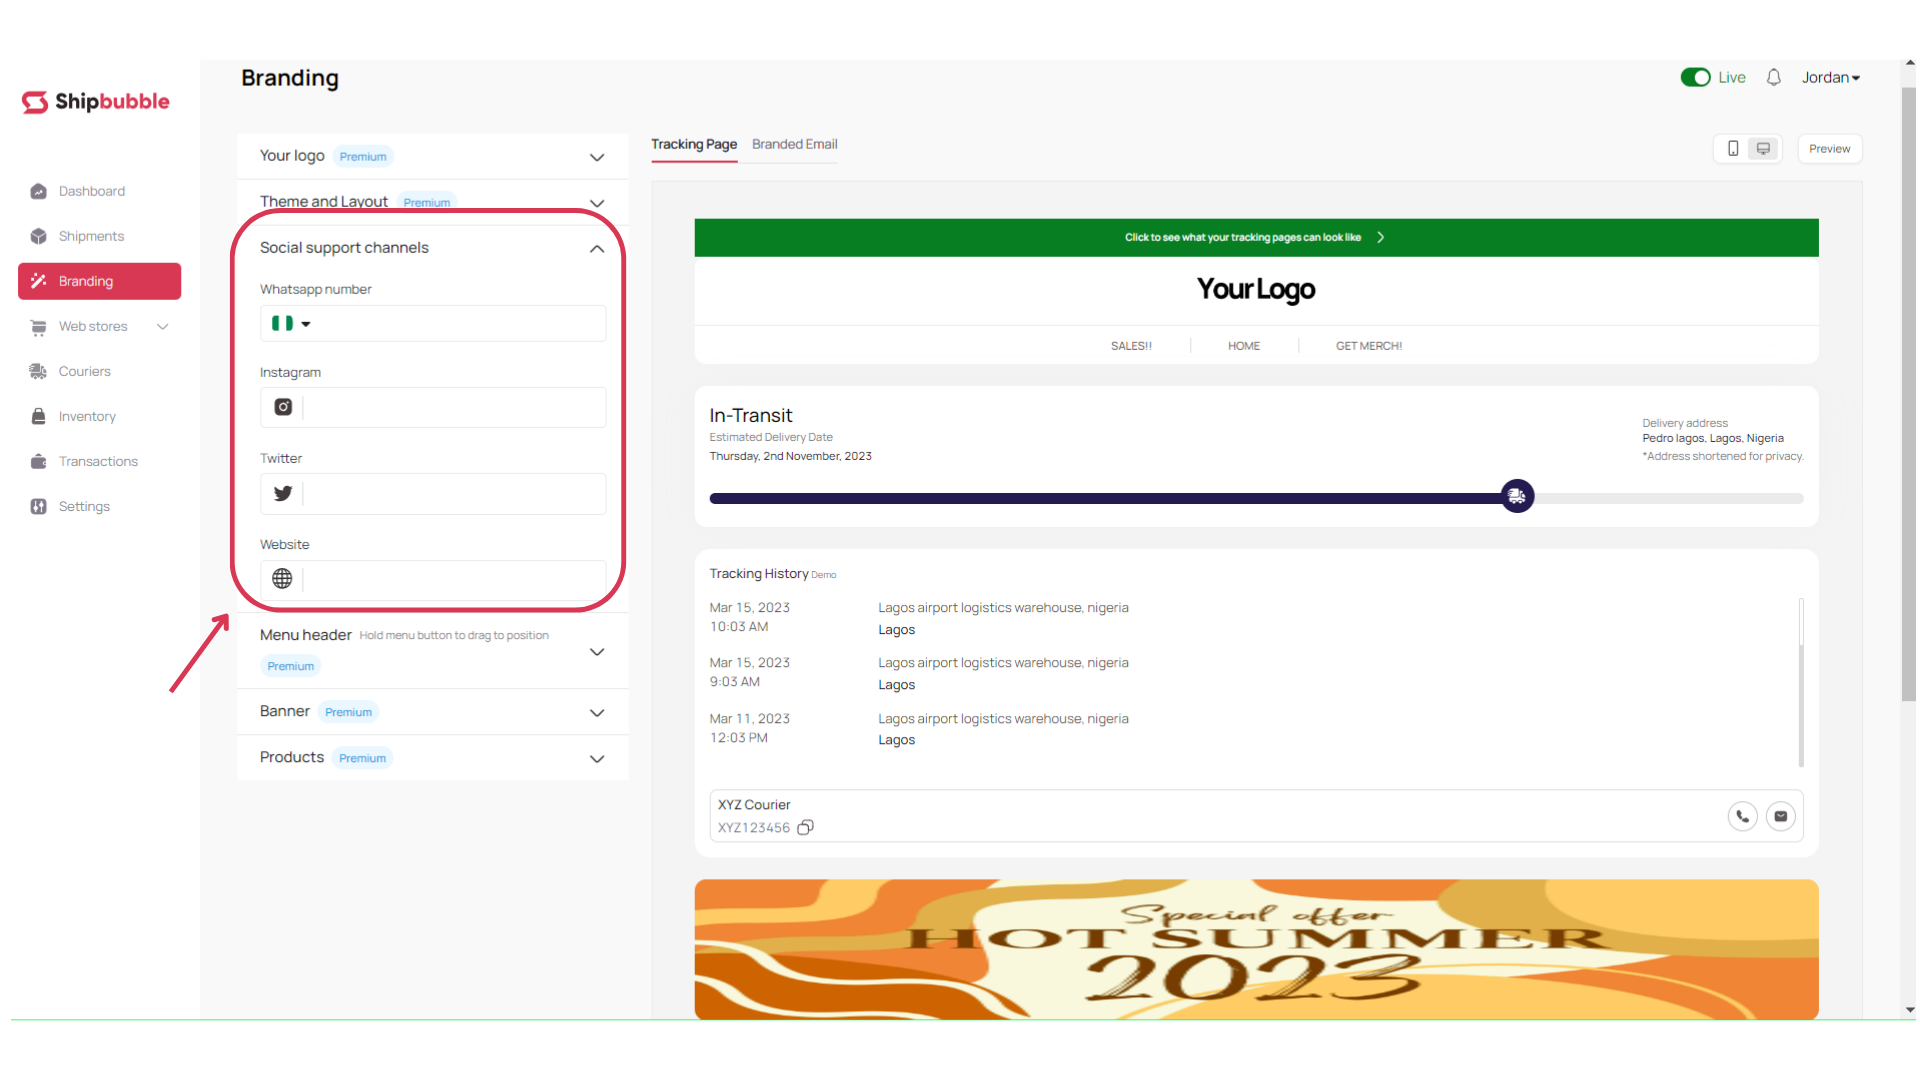
4. Add Your Social Media Links: You can include your WhatsApp number and links to your social media profiles in your emails. This is a great way to encourage customers to connect with your brand on other platforms. They will also know what options they have to reach you if they need to.
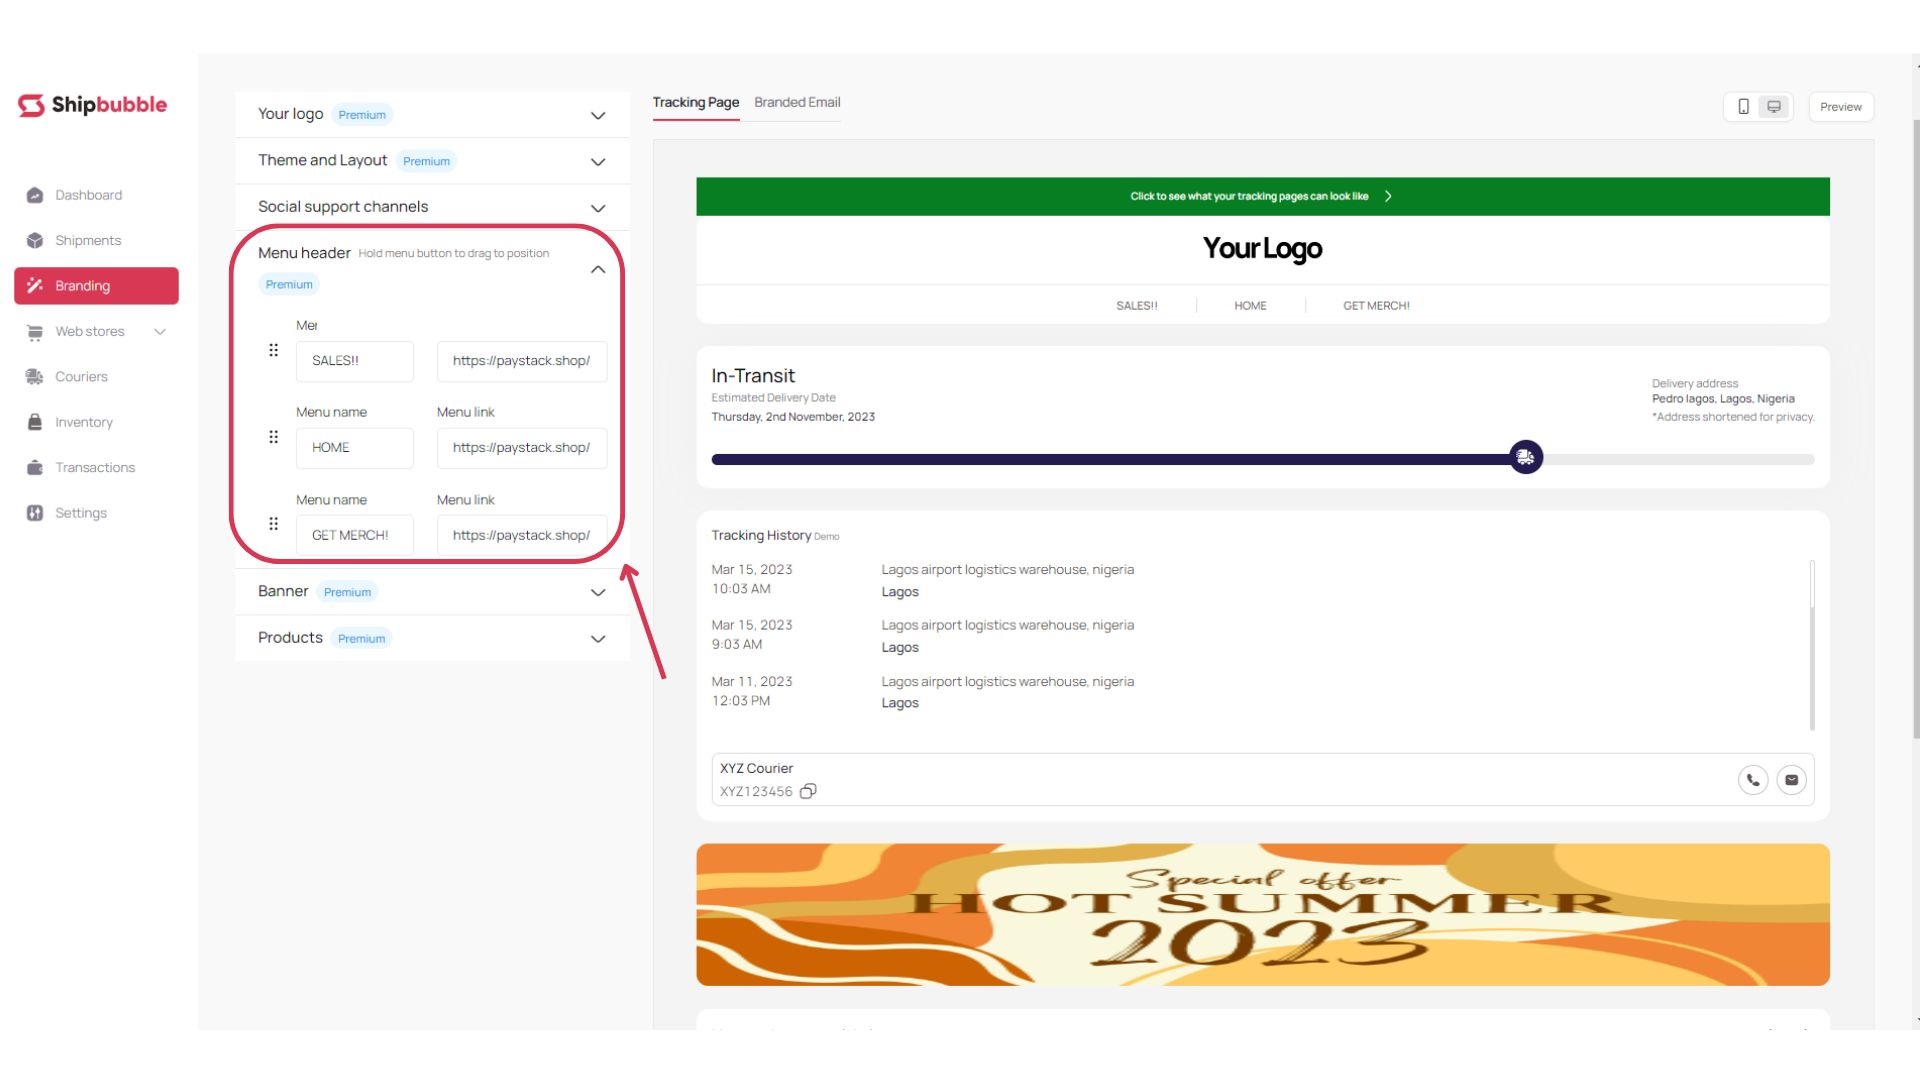
5. Customise your menu headers: These can be linked to whatever you want—a product on your website, your social media, anything.
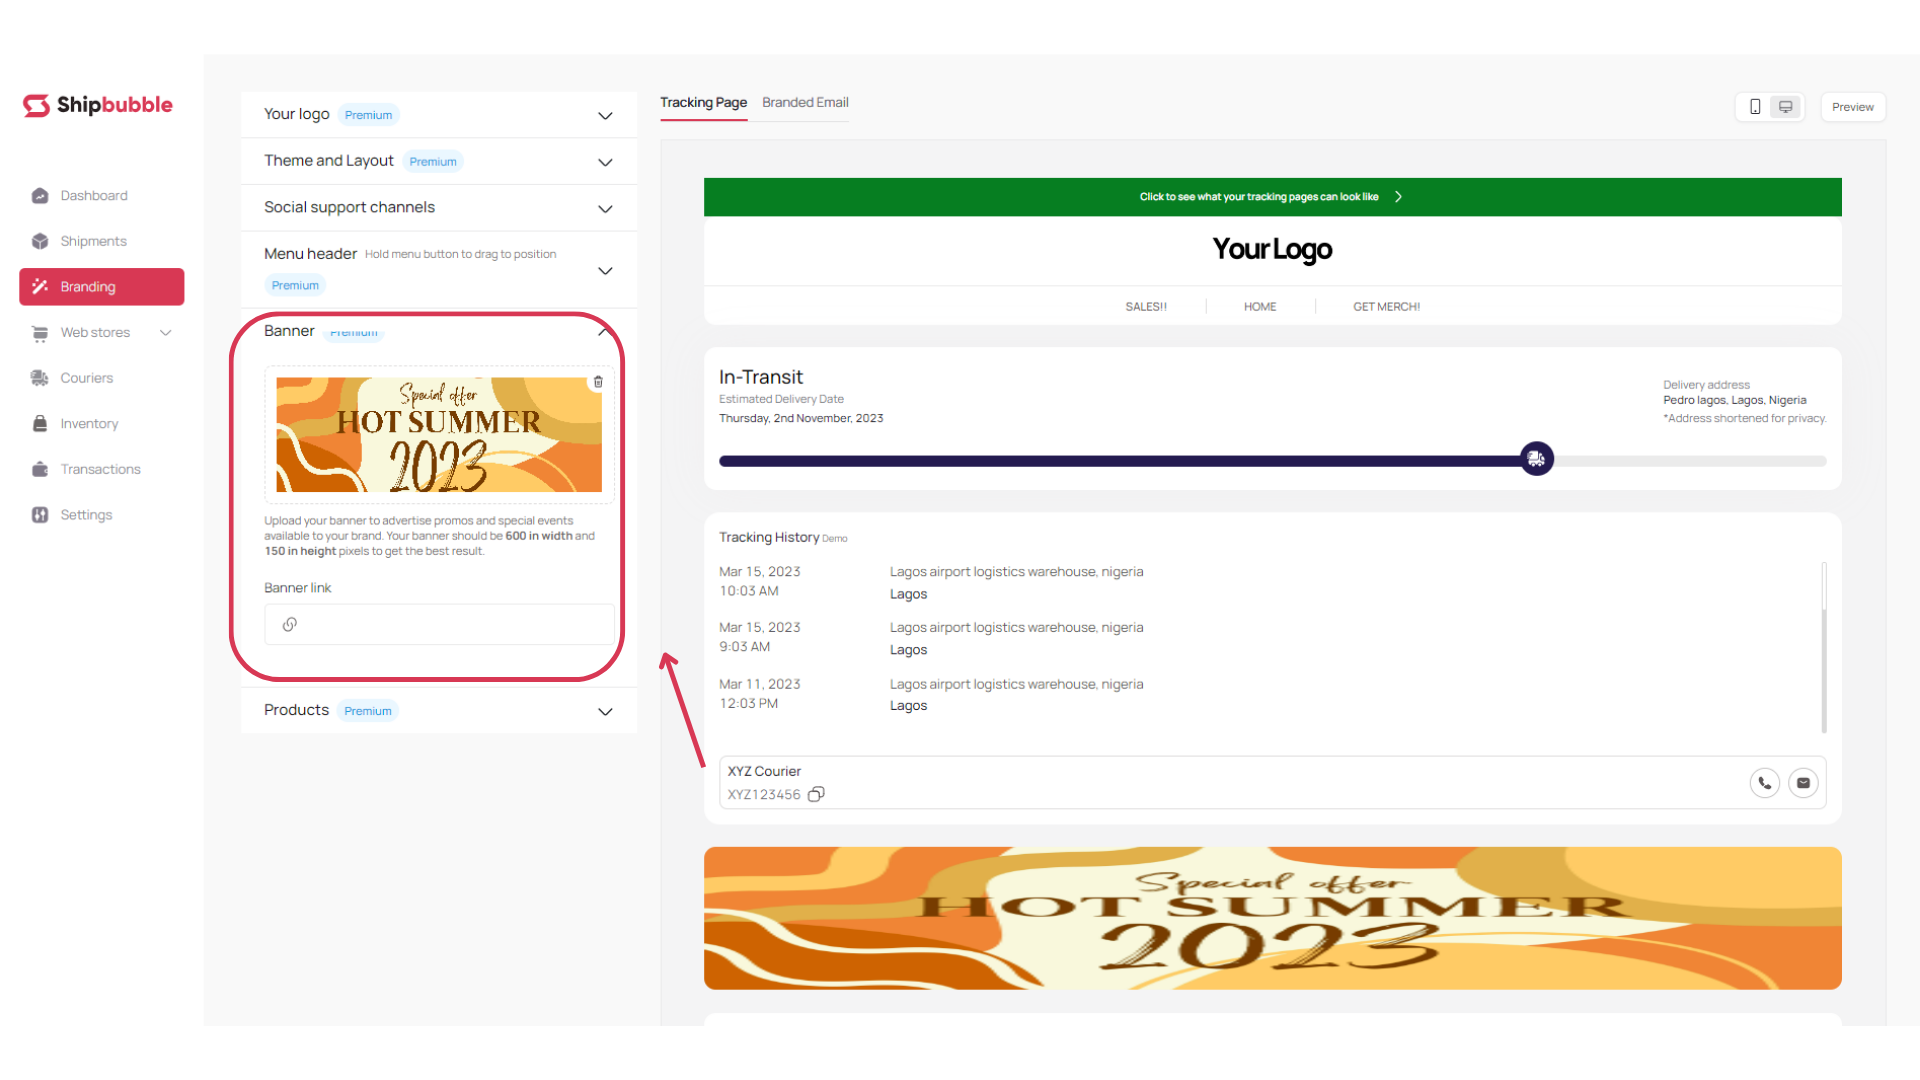
6. Upload your banner: Upload your banner to advertise promos and special events available to your brand. Your banner should be 600 in width and 150 in height pixels to get the best result.
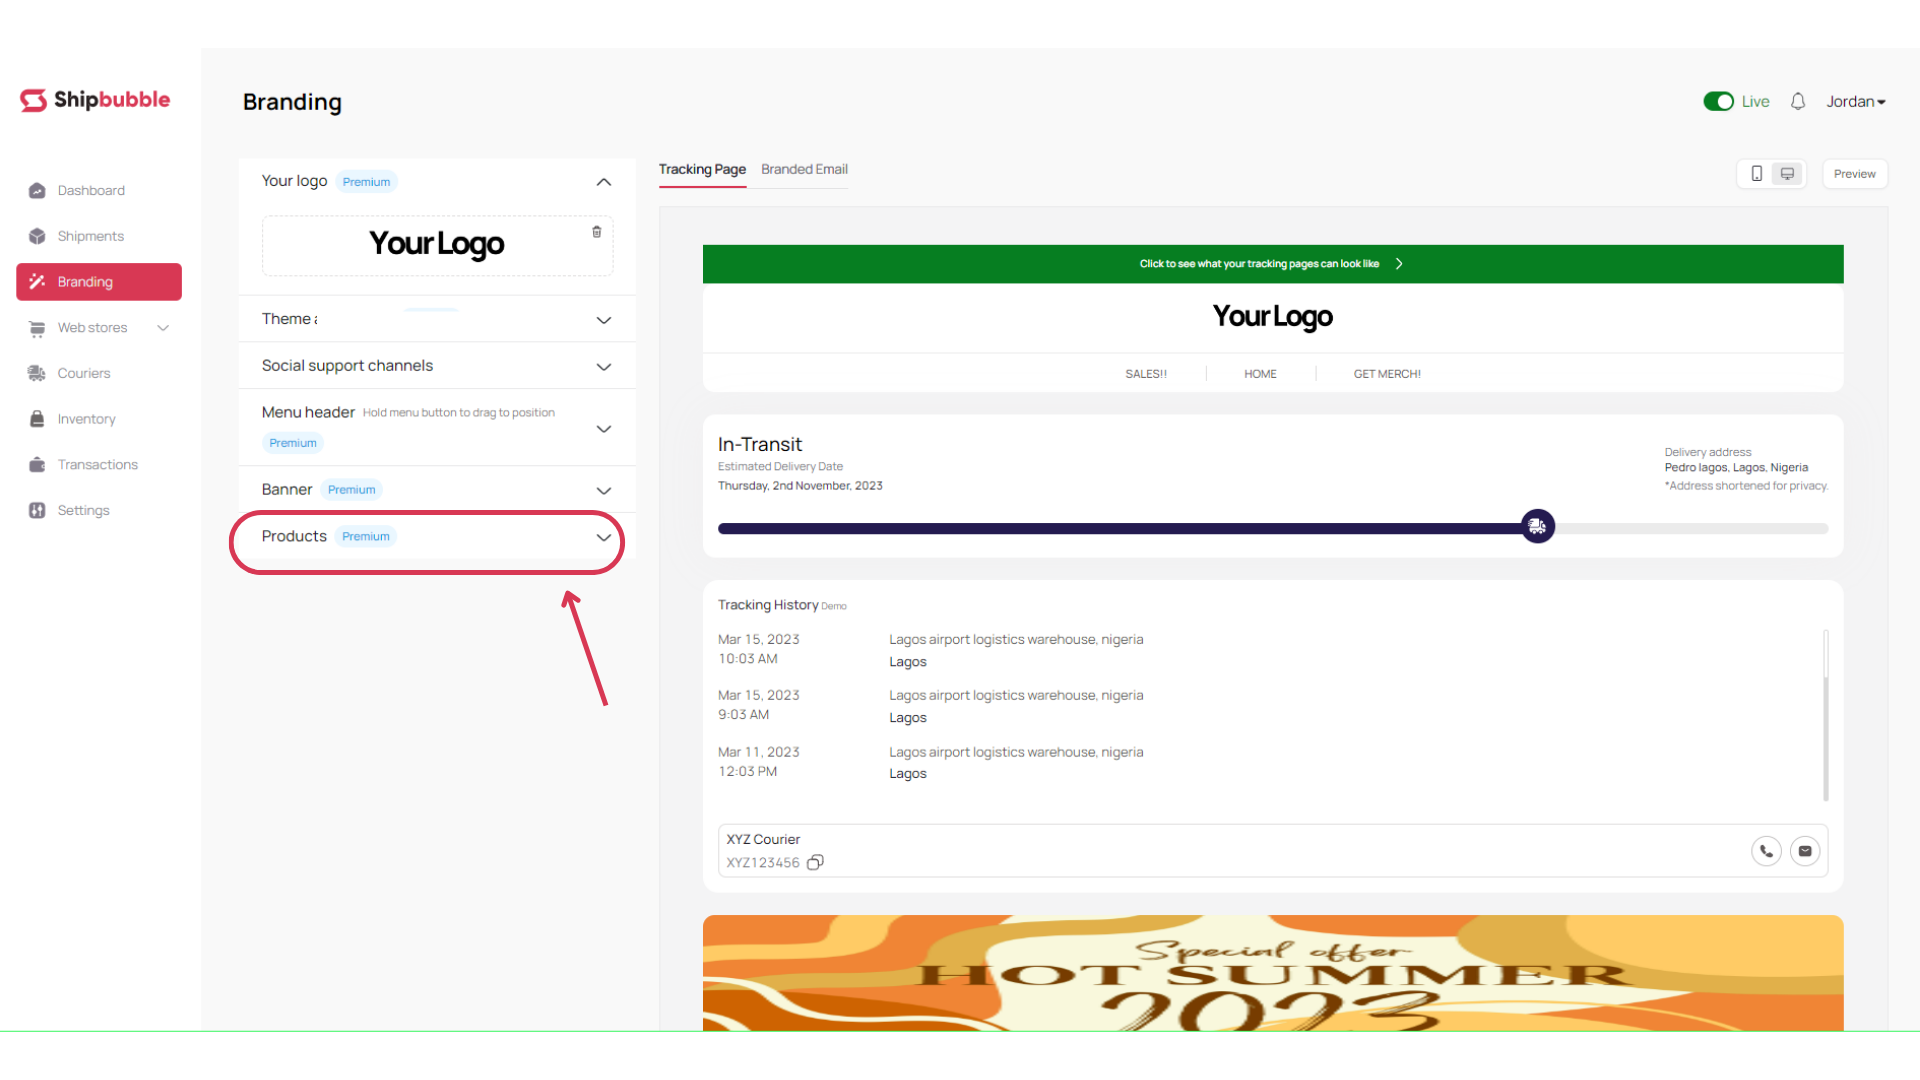
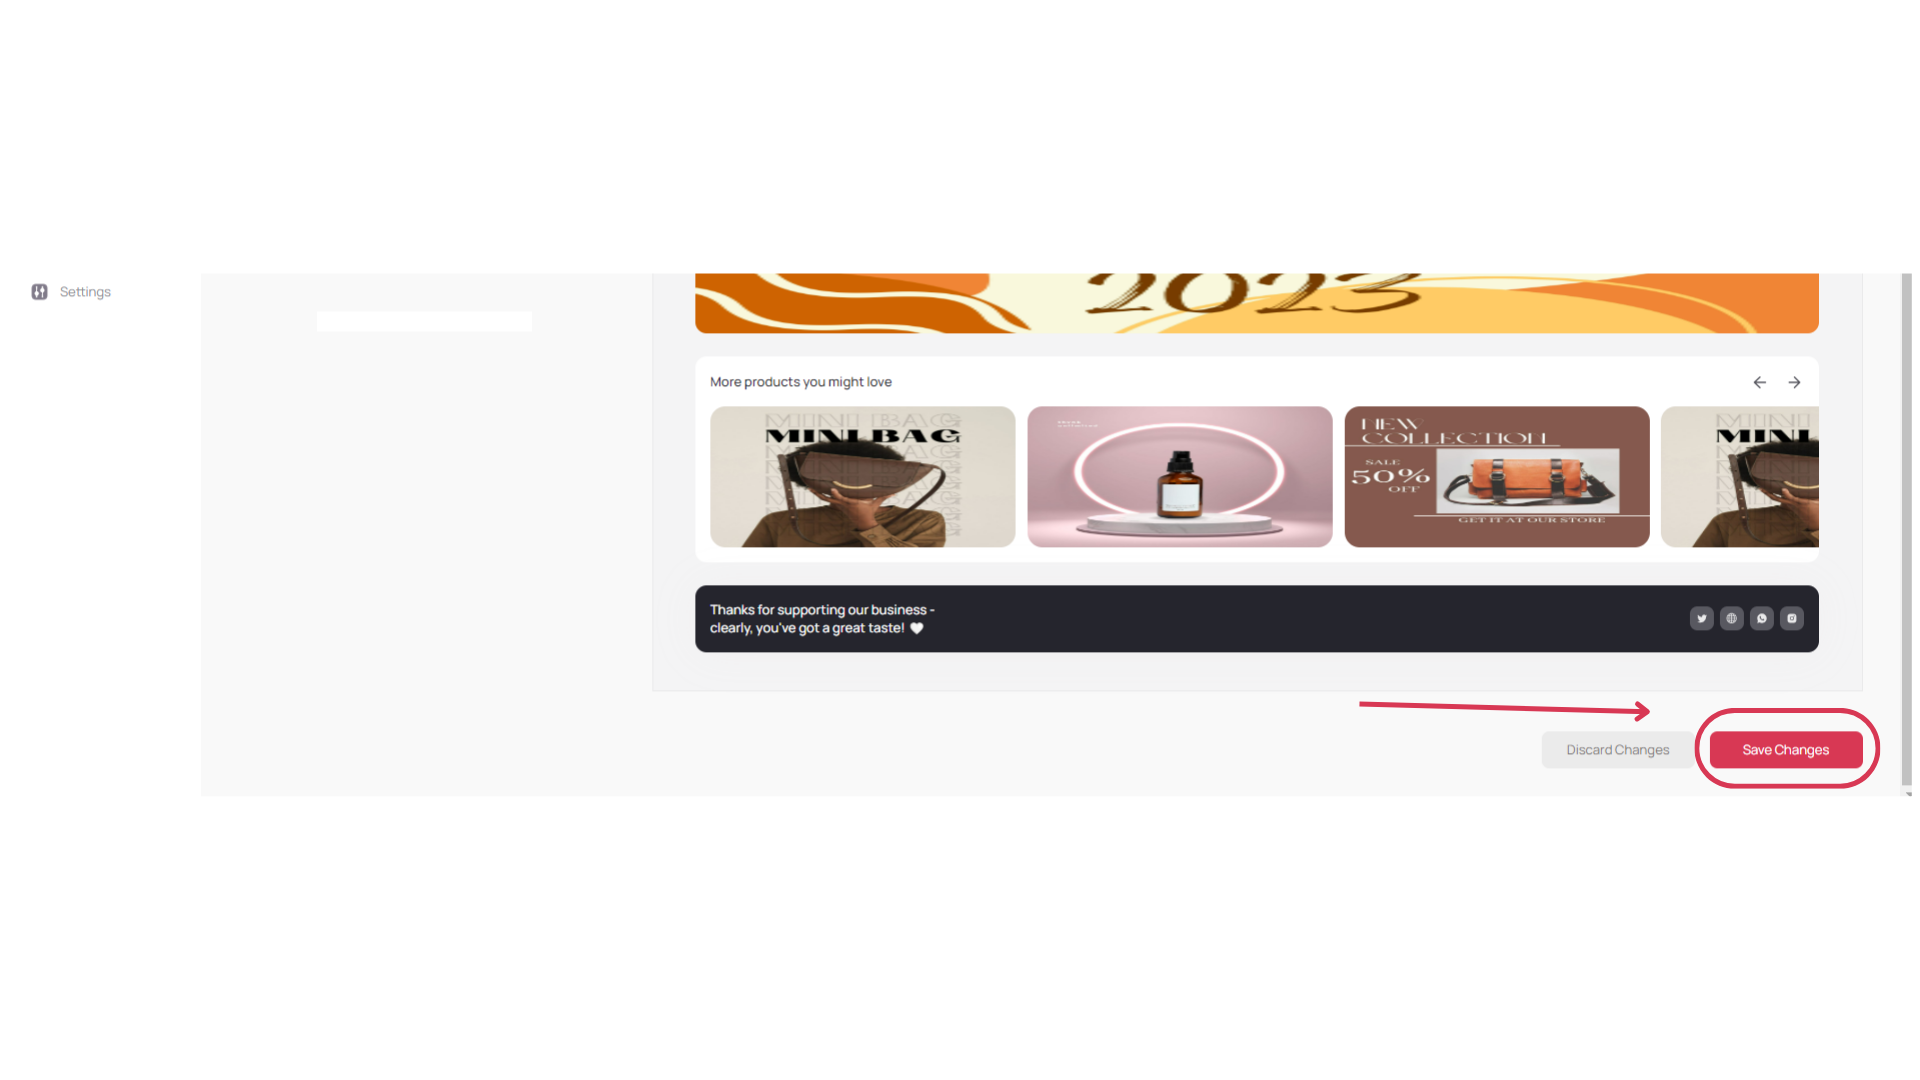
7. Advertise your products: Here you can advertise products you want to promote to your customers. You can set up to 3 ads at the same time and upsell existing customers.
8. Preview: Before fully implementing your branded email and tracking page, it's a good idea to test them to ensure they look and function as intended. You can preview the customizations you’ve made by using the preview option on the top right corner of your page.
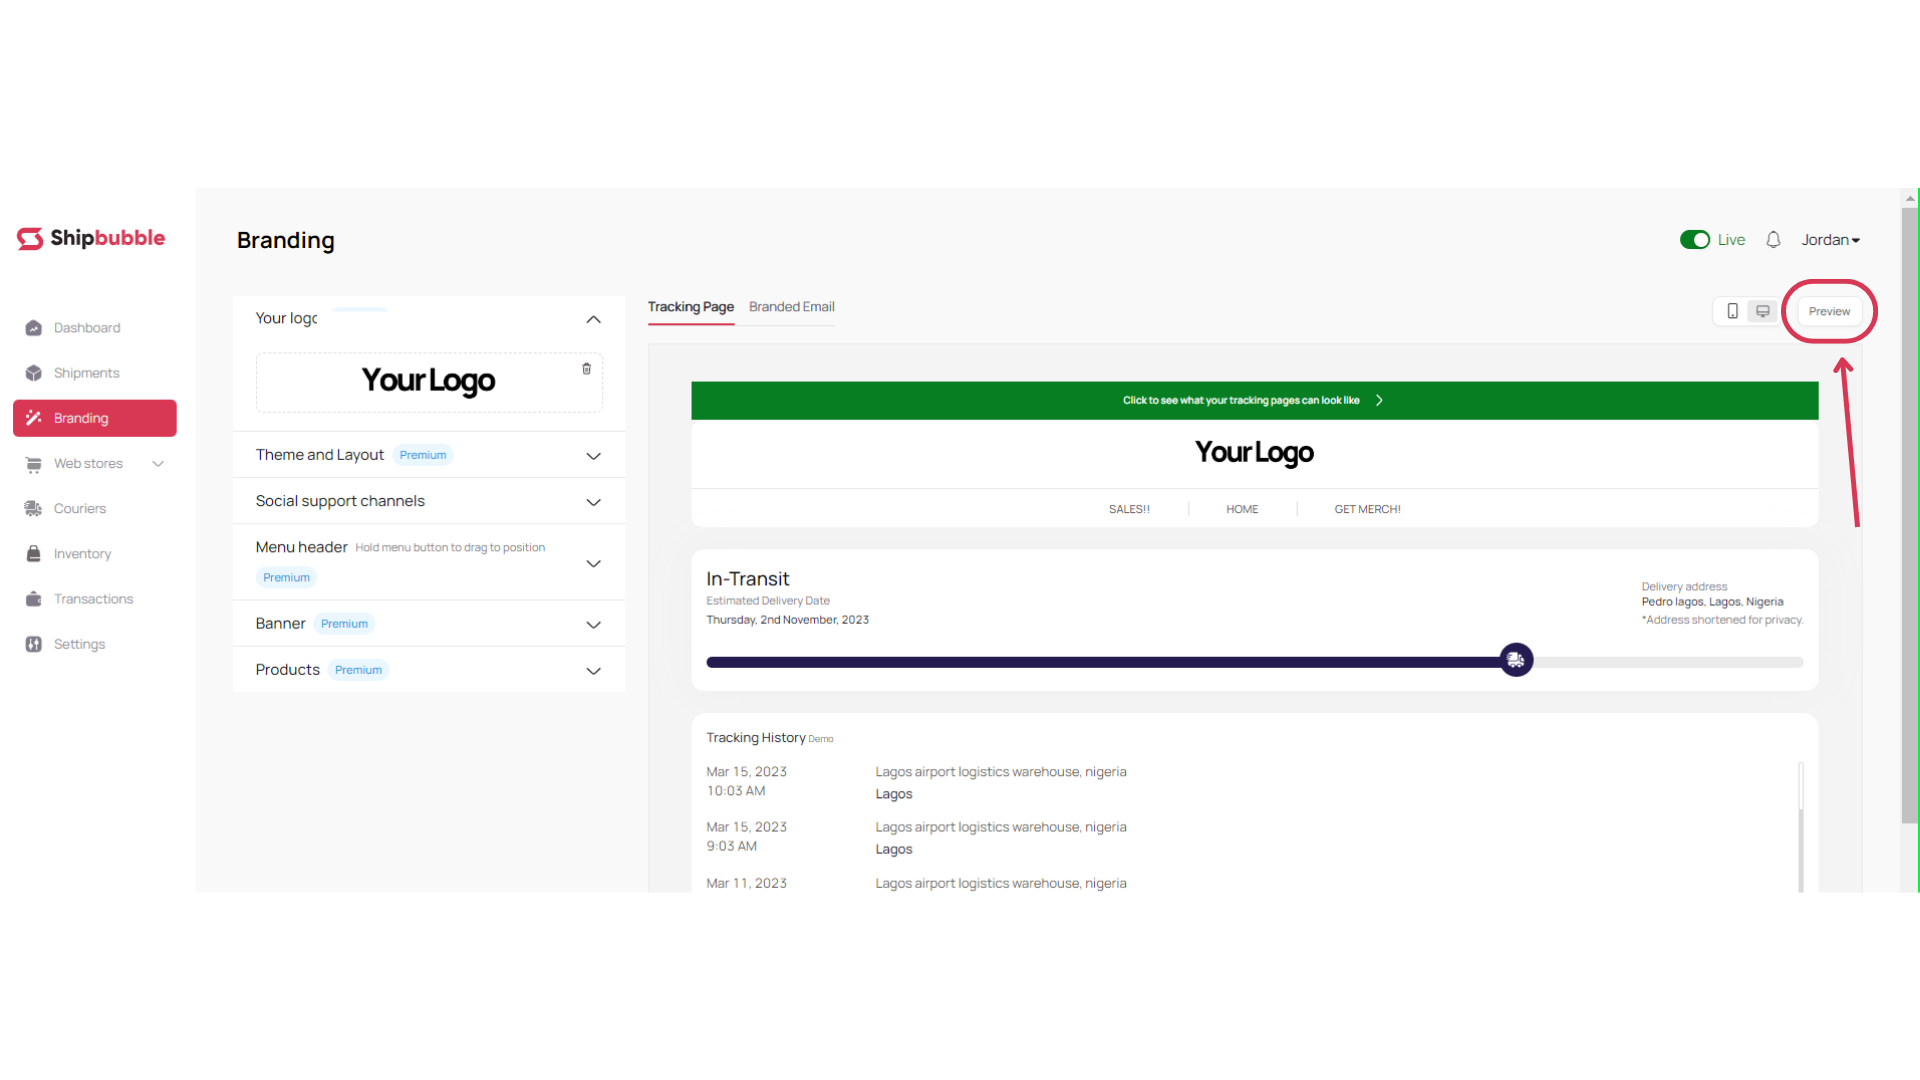
Based on your preview, make any necessary adjustments to your branded email and tracking page settings. This may involve tweaking colours, text, or the placement of your logo to achieve the desired look and feel.
9. Save Your Changes: Once you're satisfied with how your branded email and tracking page look and function, it's time to make them live for your customers to experience. Shipbubble will automatically incorporate your branding into all relevant communications and tracking pages for your shipments.
P.S. All changes and customizations made to the tracking page apply to the branded emails and vice versa.
To learn how to send a tracking link to your customers, click here.
For more information and resources on setting up your Shipbubble account, please click here.
Please let us know if you need help with anything. You can email us at hello@shipbubble.com or contact us on X/Twitter and Instagram @shipbubble.

